Bird Buddy Hummingbird Feeder: Complete Setup Guide
Bird Buddy Hummingbird Feeder Setup and Optimization Guide
My mother, Dr. Patricia Fielding, spent forty years documenting avian physiology with a weather-beaten notebook and a pair of 8x32 binoculars that cost her a month’s salary in 1984. She taught me that birding is an exercise in quiet observation and scientific patience. However, as I stand in my kitchen looking at the latest addition to my backyard—a sleek, high-tech digital eye—I realize that the "Eleanor Method" of birding has officially entered the 21st century. My total "learning tax" for failed feeders and unnecessary supplies has now climbed to a staggering $2,271.99, but this latest investment feels different. It isn't just another plastic tube; it’s a bridge between my mother’s analog rigor and my daughter Sophie’s digital world.
The Bird Buddy hummingbird feeder setup represents a significant shift from the seventeen failed attempts I logged during my first season of hummingbird feeding. Back then, I was wasting $62 on commercial red nectar and wondering why my feeders sat empty for seventeen days straight. Today, I’m managing a three-feeder system that includes a primary saucer, a window-mounted unit for my own viewing pleasure, and now, this smart hummingbird feeder with camera. This guide is born from my personal testing of this modular system, designed to help you avoid the expensive mistakes I’ve already paid for.
Key Takeaways
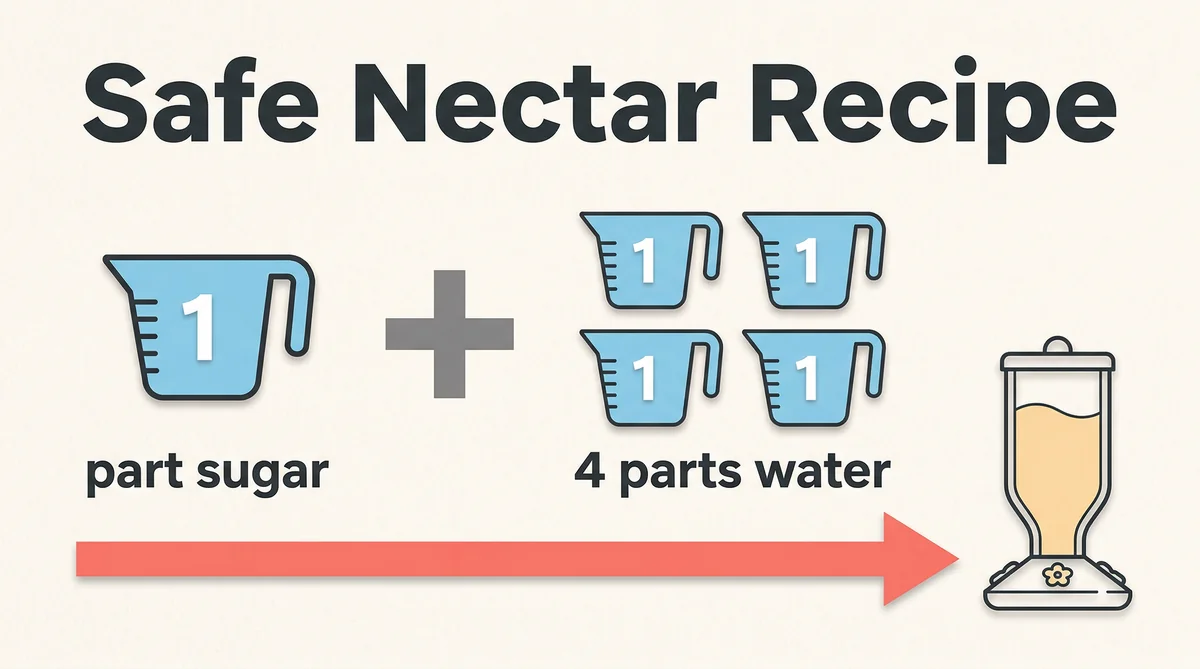
- Mix one part white granulated sugar with four parts water to create a safe 20% sucrose concentration.
- Position the feeder at least 20 feet from the house to maintain a 2 Mbps upload speed for AI features.
- Install a 19-inch diameter baffle on the mounting pole to prevent squirrel access based on the 5-7-9 rule.
- Clean the 12-ounce nectar reservoir every two days when outdoor temperatures exceed 75 degrees Fahrenheit.
Understanding the Smart Hummingbird Feeder with Camera
When you first unbox this unit, the design intent is immediately clear. Unlike the $16 red plastic saucer feeders I’ve used for three years, this device is built around a central "Smart Module" that serves as the brain of the operation. The housing is specifically engineered to position the bird directly in front of a camera capable of 5-megapixel photos and high-definition video. For someone like me, who has spent three seasons trying to identify individual Ruby-throated Hummingbirds by their territorial flight patterns, having a 2K resolution sensor a few inches from the feeding ports is a revelation.
The standard package includes a 12-ounce nectar holder, which I find to be the "sweet spot" for most backyard setups. In my experience, larger 32-ounce reservoirs often lead to nectar spoilage before the birds can finish it, especially when temperatures climb above 75 degrees Fahrenheit and you’re forced to change the solution every two to three days. The translucent basin is a feature I particularly appreciate; it allows me to monitor the nectar level from my kitchen window, twelve feet away, without having to physically disturb the feeder. This is crucial because, as I’ve observed with my resident male "The Baron," any unnecessary movement near the feeding station can disrupt their 12-to-15-minute feeding intervals.
The modular nature of this system is its strongest selling point for those of us already deep in the Bird Buddy ecosystem. If you already own a Bird Buddy camera module for a seed feeder, you can purchase the hummingbird housing separately for $99. This flexibility is a welcome relief for David, my husband, who has a dedicated spreadsheet category for my "avian infrastructure" spending. Being able to swap the universal camera module between the seed feeder and the nectar station allows us to track the migration window from May through September without buying redundant electronics.
Bird Buddy Feeder Assembly Instructions and Initial Hardware Setup
The Bird Buddy feeder assembly instructions are refreshingly simple, but there are a few "Eleanor-tested" nuances you should follow to ensure long-term success. First, do not even look at the mounting pole until you have plugged the camera module into a USB-C charger. Out of the box, the battery won't be at full capacity, and you want a 100% charge before you sync it to your home network. While it charges, download the Bird Buddy: ID & Collect Birds app. This app is your "wing buddy," and it’s where you’ll handle the digital portion of the setup.
Once the camera is charged and the app is ready, the physical assembly takes about four minutes—the same amount of time it takes me to make a double batch of nectar. The system uses a quick-connect mechanism where the stem attaches to the basin with a simple quarter-turn. Look for the embossed locking symbols on the plastic; they are subtle but vital. If you don't feel that click, the nectar holder isn't secure, and you’ll end up with 12 ounces of sugar water on your shoes—a mistake I made exactly once.
The smart camera module slides into the housing with a precision fit. Make sure the lens is clear of any fingerprints or packaging film. Hummingbirds move their wings 50 to 80 times per second, and their tongues lap nectar at 13 to 17 times per second; you don't want a smudge on the lens ruining the 2K HD footage of those incredible mechanics. After the module is seated, attach the stainless steel hanging wire. I prefer the hanging wire over a fixed mount because it allows the feeder to sway slightly, which feels more natural to birds that are used to feeding from wind-blown flowers like trumpet vine (Campsis radicans).
The Perfect Hummingbird Feeder nectar recipe for Your Smart Device
One of the most common questions I get from neighbors like Margaret is whether smart feeders require special food. They don't. In fact, the most important part of your Bird Buddy hummingbird feeder setup is avoiding the expensive, dyed products sold in big-box stores. I spent $62 on commercial nectar in my first two months before my mother pointed out that red dyes, specifically Red Dye No. 40, are linked to kidney damage in hummingbirds. The birds are attracted to the red housing of the Bird Buddy, not the color of the liquid inside.
The only hummingbird feeder nectar recipe you will ever need is the 1:4 ratio: one part white granulated sugar to four parts water. For this 12-ounce feeder, I combine 1/4 cup of sugar with 1 cup of water. This creates a 20% sucrose concentration that perfectly mimics the natural nectar found in native honeysuckle (Lonicera sempervirens). Do not use honey, which ferments too quickly and causes fatal tongue infections, and never use brown sugar or raw sugar, as the iron content is toxic to their tiny systems.
The economics of making your own nectar are undeniable. My monthly seed budget for cardinals is a firm $47, but my nectar cost has dropped to roughly $4 per month during peak season. David calculated that switching from commercial concentrate to my homemade recipe saves us $516 over a single feeding season. That’s money I’ve redirected into my "Nectar Corridor Project," replacing the trumpet vines lost to local development with native plantings. When filling the Bird Buddy, always detach the nectar holder from the housing first. This prevents any spills from getting into the camera module or the mounting hardware.
Strategic Placement and Smart Bird Feeder AI Identification
Placement is where the science of my mother meets the technology of the Bird Buddy. For the smart bird feeder AI identification to work correctly, you need two things: a stable WiFi signal and a safe environment for the birds. David used a signal tester to ensure we had at least 2 Mbps upload speed at the mounting site, which is 20 feet from our house. If the signal is weak, the AI will struggle to process the 720p HD video and identify the species.
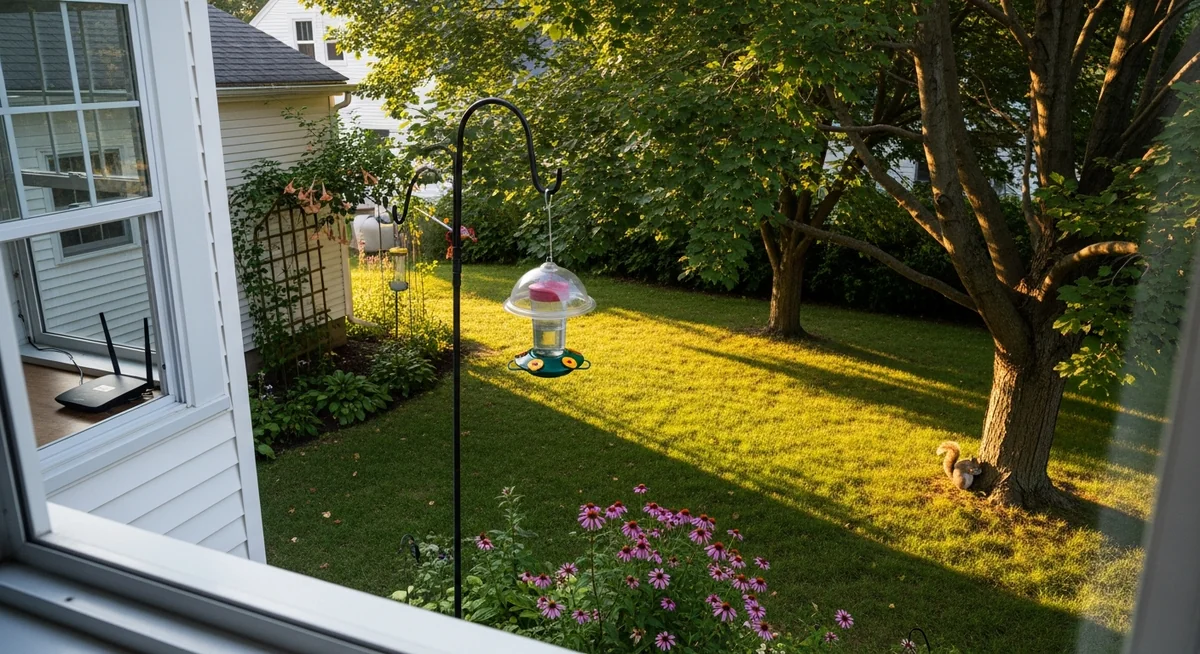
I follow the 3-to-10-foot rule for window safety: place the feeder within 3 feet of a window or more than 10 feet away. My Bird Buddy sits 20 feet out, giving the birds a clear flight path to the safety of my maple tree, where a persistent female has nested for two seasons. I also keep the feeder 5 to 6 feet off the ground, which is the optimal height for observation and predator avoidance.
Then there is the "Mr. Fitzgerald" factor. Mr. Fitzgerald is our resident squirrel, named by my son Max, and he is a master of the 5-7-9 rule: squirrels can jump 5 feet up, 7 feet across, and drop 9 feet down. To protect the Bird Buddy, I’ve positioned it on a pole with a 19-inch diameter baffle, ensuring it has at least 10 feet of horizontal clearance from any launching points. While the Bird Buddy is built to be durable, a 16-ounce squirrel landing on a nectar feeder is a recipe for a broken mounting bracket and a very unhappy Eleanor.
Once the feeder is placed and the birds discover it—which can take anywhere from a few hours to seventeen days—the AI identification begins to shine. The system claims to identify over 16,000 species. While I mostly see Ruby-throated Hummingbirds here in New England, the app has been a fantastic educational tool for Sophie. She’s become a "citizen scientist," tracking the arrival of the juveniles from last year, who have returned as adults this season to challenge "The Baron" for territory.
Maintenance and Longevity for Your Digital Birding Investment
A smart hummingbird feeder with camera is a significant investment, and it requires a more rigorous maintenance schedule than a standard $16 saucer. The nectar holder must be cleaned every 3 to 5 days in mild weather, and every 2 days if the temperature exceeds 75 degrees. I use a cleaning brush kit and a solution of one part bleach to nine parts water every two weeks to prevent the growth of black mold or bacteria. After bleaching, I rinse the components at least three times; hummingbirds have a highly developed sense of taste and will reject any feeder with a chemical residue.
Charging the camera module is another new ritual. During peak season, when "The Baron" is visiting every 12 to 15 minutes, the battery drains faster due to the high volume of video triggers. I’ve found that the solar roof option is almost essential if you don't want to bring the module inside for charging every few days. If you don't have the solar roof, I recommend charging the module overnight when the birds are in torpor. Torpor is a state of suspended animation where their heart rate drops from 1,260 beats per minute to almost nothing to conserve energy; they won't miss the camera while they're "sleeping."
Finally, consider the seasonal timing. In our region, the migration window is May through September. I put my Bird Buddy out in late April, about two weeks before I expect the first arrival. This ensures that when the "scouts" pass through, they find a reliable, clean food source. I keep the feeders up for two weeks after I see the last bird in September to help the late migrants who are fueling up for their flight across the Gulf of Mexico.
Reflections on a Digital Backyard
The transition to a smart birding setup hasn't been without its hiccups. I still remember the sinking feeling of my first seventeen failed attempts at attracting hummingbirds, and David still teases me about the $1,847 I spent on feeders that ended up in the garage. However, the Bird Buddy hummingbird feeder setup has fundamentally changed how we interact with the nature in our yard. Instead of just seeing a "green blur" at the window, we now have high-definition records of the individual personalities that make up our local population.
Yesterday morning, at exactly 6:47 AM, the app sent a notification to my phone. It was "The Baron," his throat feathers flashing an iridescent ruby red in the morning sun. Sophie and I watched the video together over breakfast, seeing the way his tongue moved and the way he scanned the yard for rivals—the "twelve-second test" I’ve seen cardinals perform, but accelerated for the high-speed life of a hummingbird. In that moment, the "learning tax" felt completely worth it. We weren't just feeding birds; we were witnessing a hidden world that my mother could only have dreamed of seeing so clearly.
By following these Bird Buddy feeder assembly instructions and adhering to a strict nectar and cleaning protocol, you can create a sanctuary that is both scientifically sound and technologically advanced. You don't need red dye, and you don't need to spend $47 a month on commercial products. You just need a 1:4 ratio, a safe placement, and a little bit of patience. The birds will find you, and when they do, you’ll be ready to capture every 80-beat-per-second moment.
The joy of birding has always been in the details—the specific curve of a beak, the territorial chirps, the returning generations. With a smart feeder, those details are no longer reserved for those with forty years of field experience and professional-grade optics. They are available to anyone with a window, a WiFi signal, and a desire to understand the tiny, feathered miracles that share our world. As my mother would say, the birds have a special claim on our friendship, and now, we have the perfect way to document that bond.